Questions?
Contact us at support line.
US: 877-270-3475
or
Log in to back office to chat with a representative
Contact us at support line.
US: 877-270-3475
or
Log in to back office to chat with a representative
Visit NCR.com/Silver
Browse by categories
The Bixolon SRP-310 printer can connect to multiple iPads through a wired Ethernet connection or a Wi-Fi connection.
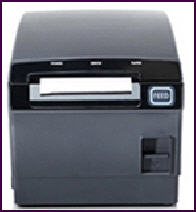
To use the Bixolon SRP-310 printer with a wired connection:
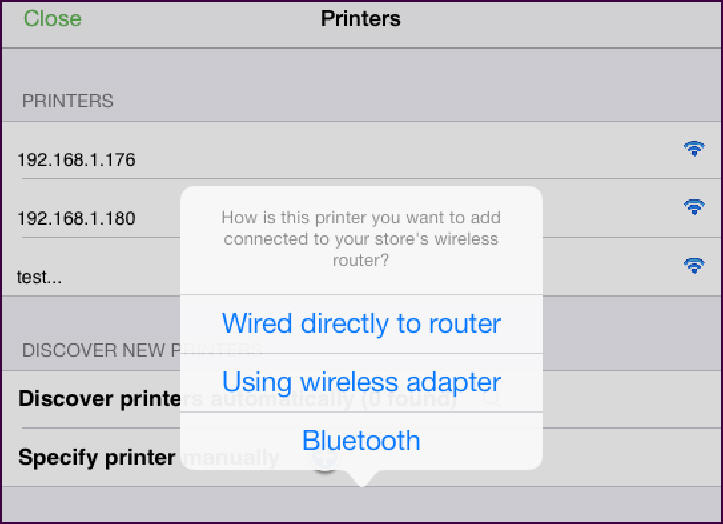
To use the Bixolon SRP-310 with a wireless connection:
If the printer is not near the router, you can use the Wi-Fi adaptor to wirelessly connect your printer to the router.
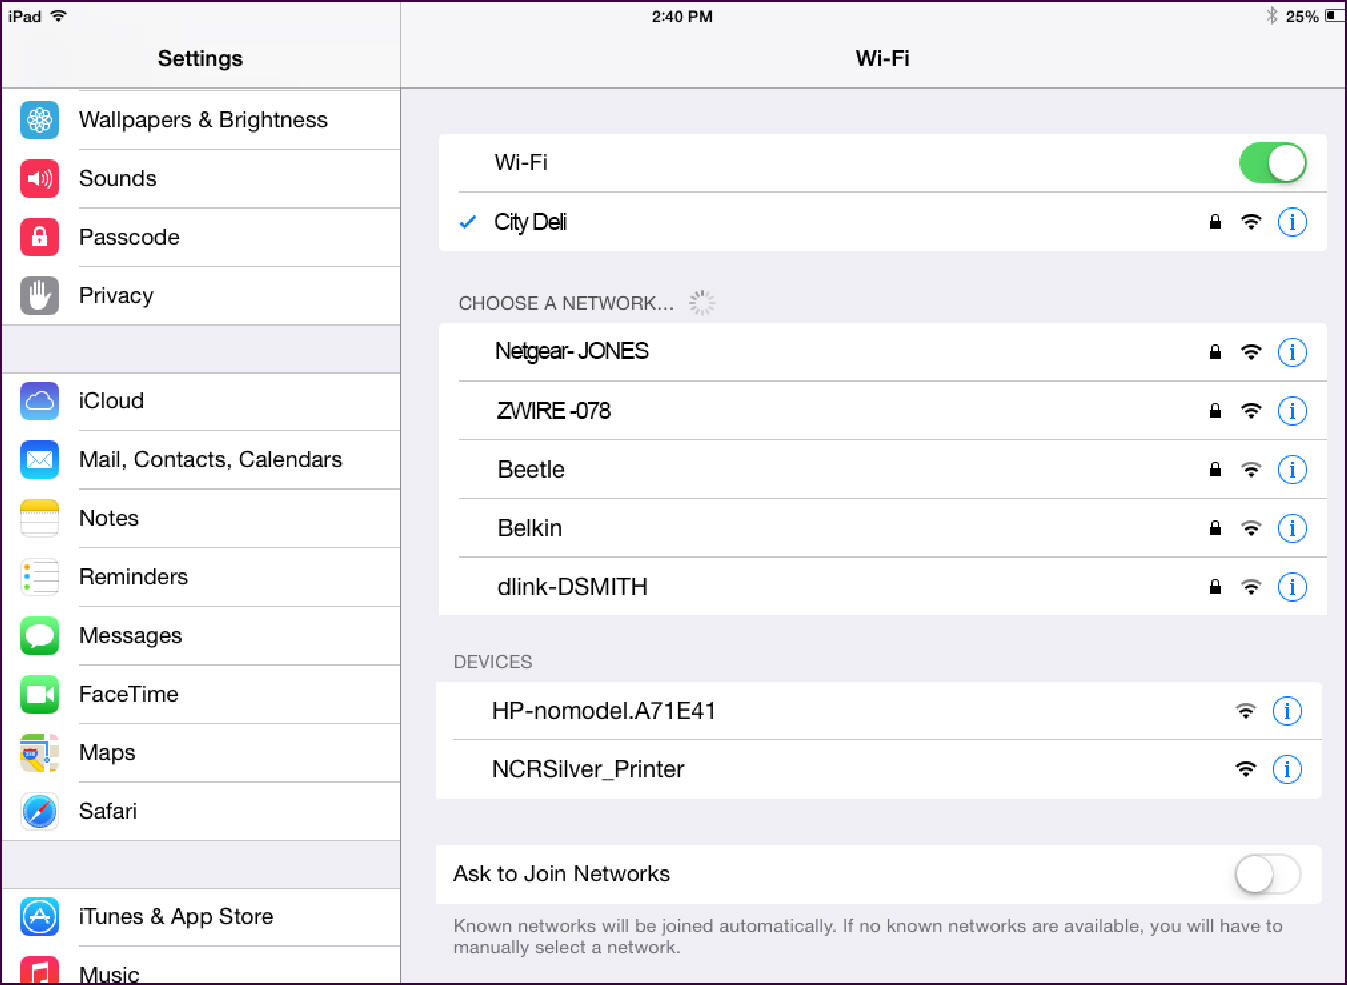
To load paper into the Bixolon SRP-310 printer:
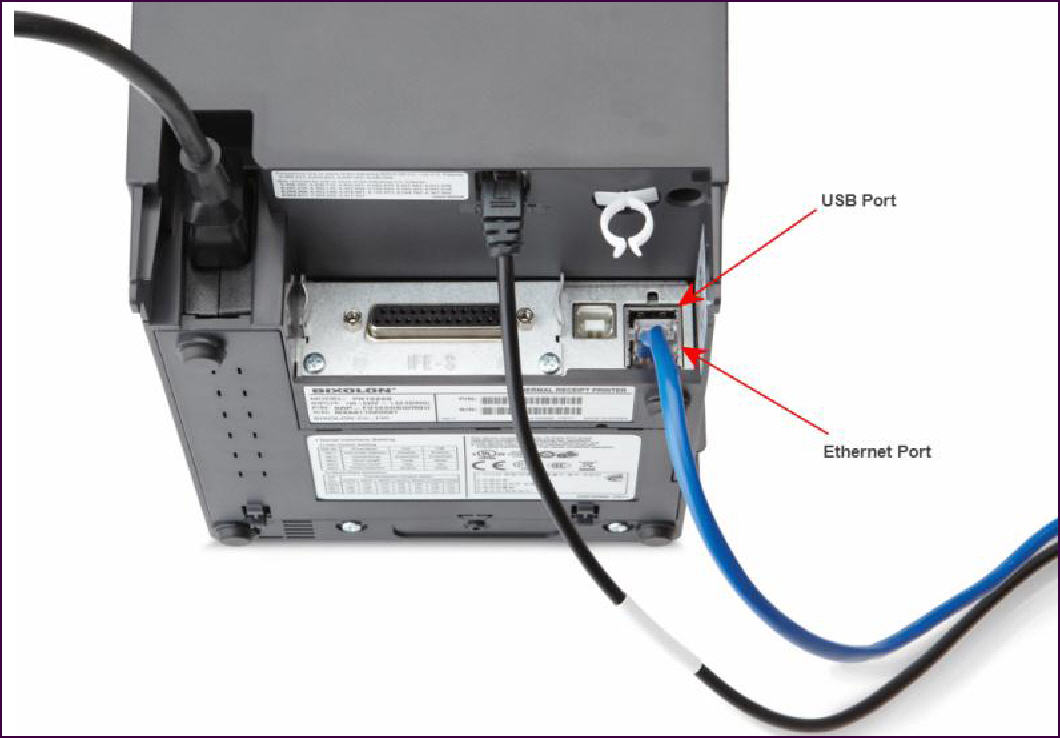
To use the Bixolon SRP-310 printer with a wired connection:
- Plug one end of the power cord into the back of the printer on the left side and the other end into an outlet. The LED light under POWER on the front of the printer turns blue.
- Plug one end of the Ethernet cable into the Ethernet port on the back of the printer on the lower right side, and plug the other end into an available LAN port on your router.
Refer to Configuring Printers for a Device.
To use the Bixolon SRP-310 with a wireless connection:
If the printer is not near the router, you can use the Wi-Fi adaptor to wirelessly connect your printer to the router.
-
Plug one end of the power cord into the back of the printer on the left side and the other end into an outlet. The LED light under POWER on the front of the printer turns blue.
-
Plug the Wi-Fi adaptor into the USB port on the back of the printer on the lower right side.
-
On the iPad device, log in to the POS app with your four-digit PIN.
-
On the POS home screen, tap
to display the slide out menu.
-
Tap Settings.
-
Tap Configure printers. The Printers screen appears.
-
Press and hold Specify printer manually. A prompt appears.
-
Tap Using wireless adapter. A wireless printer prompt appears.
-
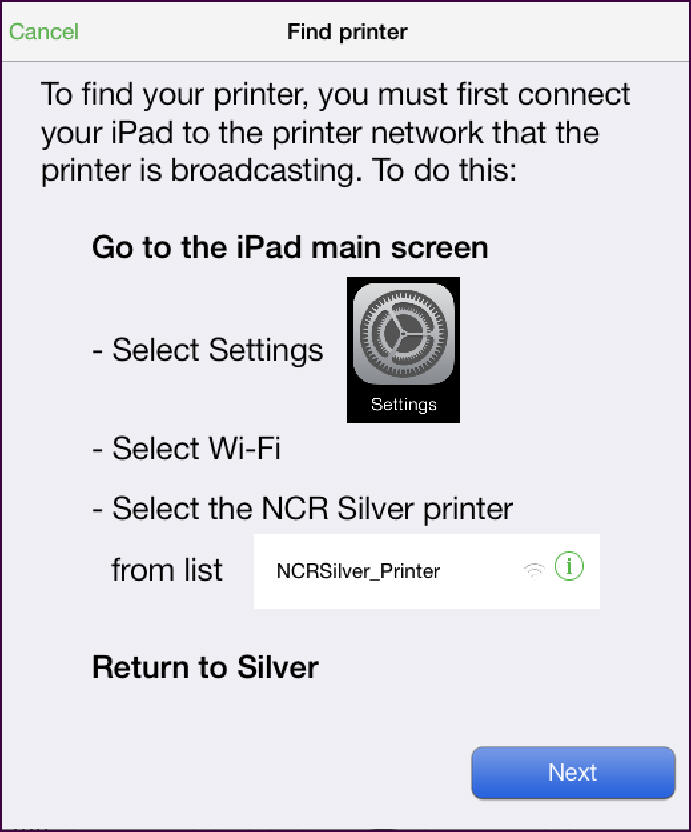
Tap No. The ‘Find printer’ screen appears. To connect the printer to your Wi-Fi network, it is temporarily necessary to change the iPad Wi-Fi settings to the printer.
-
Tap the home button to return to the home screen.
-
Tap Settings > Wi-Fi.
-
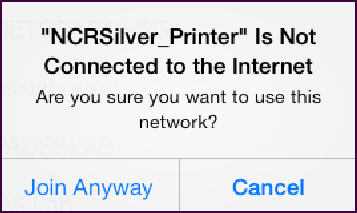
Under ‘DEVICES,’ tap NCRSilver_Printer. A prompt appears.
It may take a few minutes for NCR Silver Printer to appear under devices.
-
Tap Join Anyway. The iPad connects to the printer, and the iPad Wi-Fi connection changes to ‘NCRSilver_Printer.’
-
Press the home button twice to minimize the Settings screen and to see a list of open apps.
-
Tap NCR Silver Pro. NCR Silver Pro opens to the ‘Find printer’ screen and does not require you to log in.
-
Under ‘Return to Silver,’ tap Next. The printer prints a message indicating the name of the iPad configuring the printer. The ‘Wi-Fi networks’ screen appears.
-
Tap your Wi-Fi network. The network password prompt appears.
-
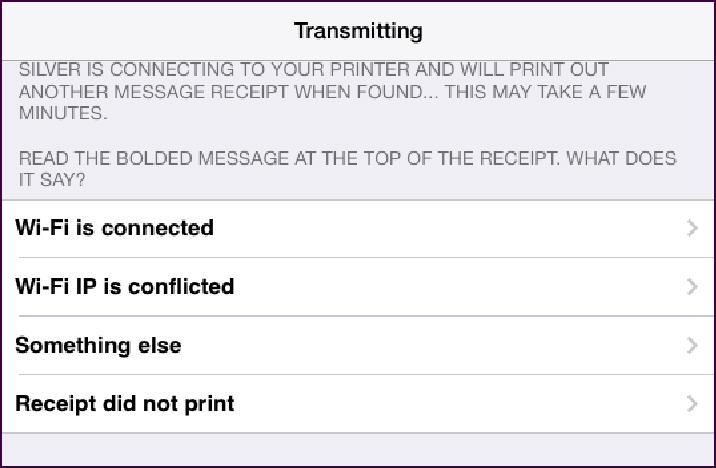
Enter your Wi-Fi password, and then tap OK. The ‘Transmitting’ screen appears. The printer prints a ‘Wi-Fi is connected’ confirmation message with the Wi-Fi settings of the printer. You have now connected the wireless adapter for the printer to your Wi-Fi network.
If you entered the incorrect password, a ‘Password is incorrect’ message prints. Tap Something else, tap Yes, and begin the connection process again. Follow the Reset printer instructions on the screen to re-initialize the printer.
-
Tap Wi-Fi is connected. The ‘Find printer’ screen appears. It is now necessary to reconnect your iPad to your Wi-Fi network.
If your printer did not print a ‘Wi-Fi is connected’ confirmation message, tap the appropriate message, determined from the printed message, as to why your printer did not connect. If the printer did not print a message, tap Receipt did not print.
-
Press the home button twice to minimize NCR Silver Pro.
-
Tap Settings > Wi-Fi.
-
Tap your Wi-Fi network. The iPad reconnects to your Wi-Fi network.
-
Press the home button twice to minimize the Settings screen.
-
Tap NCR Silver Pro. NCR Silver Pro opens to the ‘Find printer’ screen and does not require you to log in.
-
Under ‘Return to Silver,’ tap Next. The ‘Locating printer’ screen appears while the POS searches for the printer. When the POS locates the printer, the printer prints a confirmation message and the ‘Printer found’ screen appears.
-
Tap Next. The ‘Transmitting’ screen appears. When the POS confirms the printer presence, a confirmation message prints with the Wi-Fi settings of the printer.
-
Tap Wi-Fi is connected. The ‘Printer’ options screen appears.
If your printer did not print a Wi-Fi is connected confirmation message, tap the appropriate message, determined from the printed message, as to why your printer did not connect. If the printer did not print a message, tap Receipt did not print.
-
Under ‘GIVE THIS PRINTER A NAME,’ type the printer name.
-
Configure the printer as a receipt or kitchen printer.
To load paper into the Bixolon SRP-310 printer:
-
On the front right side of the printer, press the switch down. The cover lid opens.
-
Place a paper roll inside the compartment with the end of the roll on top.
-
Pull a portion of the paper over the top of the receipt paper roller and close the cover lid.
-
Press FEED to test the paper loaded correctly.
-
Tear off the excess paper.
