Questions?
Contact us at support line.
US: 877-270-3475
or
Log in to back office to chat with a representative
Contact us at support line.
US: 877-270-3475
or
Log in to back office to chat with a representative
Visit NCR.com/Silver
Browse by categories
For restaurants with multiple stores, you can centrally manage multiple stores in Silver Back Office with one login. NCR Silver Pro contains a company level and specific store levels for you to manage your operation. Each level includes different configuration, control, and managing capabilities. At the company level, you can control such things as items, modifiers, discounts, user roles, and more. At the store level, you can customize information specific to each store, such as tax rates and receipt information, and you manage labor and financial shift functions. You add employees and items at both levels; however, at the store level, you do so with limited capabilities. NCR Silver Pro Restaurant provides reporting for both your company and individual stores.
To add additional stores, contact the customer care team at 877-270-3475 for assistance.
You access Silver Back Office through a Web browser to configure the majority of settings related to your restaurant, such as your company and store information, menu, employees, user roles, taxes, payments, and more. When you log in to Silver Back Office, you select whether to access data at the company level or for a specific store. You can easily change from one to the other.
Adding a Store
To add additional stores, contact the customer care team at 877-270-3475 for assistance.
Logging In to Silver Back Office
You access Silver Back Office through a Web browser to configure the majority of settings related to your restaurant, such as your company and store information, menu, employees, user roles, taxes, payments, and more. When you log in to Silver Back Office, you select whether to access data at the company level or for a specific store. You can easily change from one to the other.
-
Access Silver Back Office through a Web browser.
-
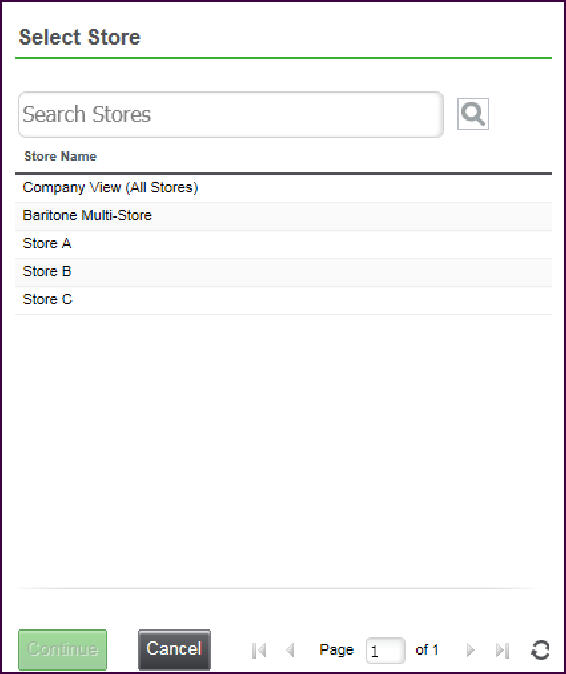
Type your username and password. The ‘Select Store’ prompt appears.
-
Click Company View (All Stores) or the specific store you want to view.
The name of the selected location appears to the left of your username at the top right side of the screen.
-
Click Continue. The Web browser opens to the My Store page for the level you selected.
Changing the Location View
You can quickly change your view from the company level to a specific store, from one store to another, or from a store to the company.
-
Click
to the left of your username at the top right side of the screen. The ‘Select Store’ prompt appears.
-
Select the specific store or Company View (All Stores) and click Continue. The system switches your view in Silver Back Office to the selected location.