Questions?
Contact us at support line.
US: 877-270-3475
or
Log in to back office to chat with a representative
Contact us at support line.
US: 877-270-3475
or
Log in to back office to chat with a representative
Visit NCR.com/Silver
Browse by categories
Configuring Items for Use with the Scale
Prior to configuring the scale for use with POS system, you must first configure at least one item to be priced by weight in your Back Office. If you do not configure an item to be priced by weight, you will not see the configure scales setting on the POS.
When creating items priced by weight, you can also define a tare. Tare refers to the weight deducted from the gross item weight to allow for the weight of the container. When you establish tares, the total price of the product is calculated based on the net weight (gross weight minus tare weight) times the unit price.
To configure an item without variations for use with the scale:
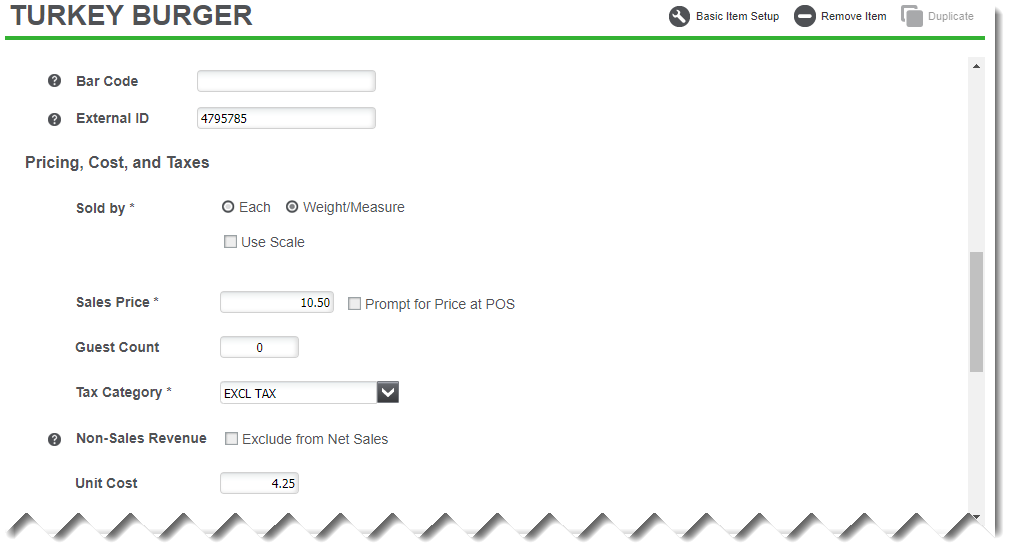
- In the Back Office, select MENU > CATEGORIES & ITEMS.
- Select the category containing the item.
- Select the item. The Item Details screen appears.
- Scroll to the Pricing, Cost, and Taxes section and select Weight/Measure.
- Select Use Scale.
- Select the unit measurement from the drop-down list.
- Type the tare weight.
- Type the sales price for the item.
- Click Save.
- In Back Office, select MENU > CATEGORIES & ITEMS.
- Select the category containing the item.
- Select the item. The Item Details screen appears.
- Click Add a Variation. The Item Variations screen appears.
- Select a variation type, such as size, and add the item variations, such as Small, Medium, and Large from the drop-down list.
- Click Done. The system returns to the Item Detail screen.
- Under Pricing, Cost, and Taxes select Use variation Size for pricing from the Price drop-down list.
- Select Weight/Measure.
- Select Use Scale.
- Select the unit of measurement from the drop-down list.
- Type the tare weight and the sales price and the for each item variation.
- Click Save.