Questions?
Contact us at support line.
US: 877-270-3475
or
Log in to back office to chat with a representative
Contact us at support line.
US: 877-270-3475
or
Log in to back office to chat with a representative
Visit NCR.com/Silver
Browse by categories
Tax Categories and Tax Rates
The system makes it easy to calculate sales tax rate on all of your items. We even get you started with a No Tax category. You will first set up your tax categories, such as retail, food, alcohol, etc. Then, you will decide which tax category should be your default tax category. Later, when you create your items in your inventory, the system will automatically assign your default tax category to the items for you to save you time.
Tax Jurisdictions
The system also allows you to set up and report on multiple tax jurisdictions that are calculated independently of each other for those selling locations that require unique tax scenarios. We will also itemize the tax jurisdictions on the receipt, as is often required by local regulations. The tax jurisdictions are tied to your tax categories and selling locations. This means when you add a selling location, you can designate any local tax jurisdictions. Additionally, if you have already set up your tax locations and categories, you can simply edit the tax location to enable tax jurisdictions.
Add a Tax Category
By default, your store already has a No Tax tax category for use with tax-exempt items. To add a tax category:
Edit a Tax Category
If you want to edit an existing tax category:
NOTE: Removing a tax category is a "soft delete". This means that although the tax category is removed from your view, all the data and activity associated with that tax category is still shown in reports, transactions, etc.
If you want to remove a tax category you have already set up:
Tax Jurisdictions
Add a Tax Category
- Click the Settings
icon located at the top-right corner of the screen.
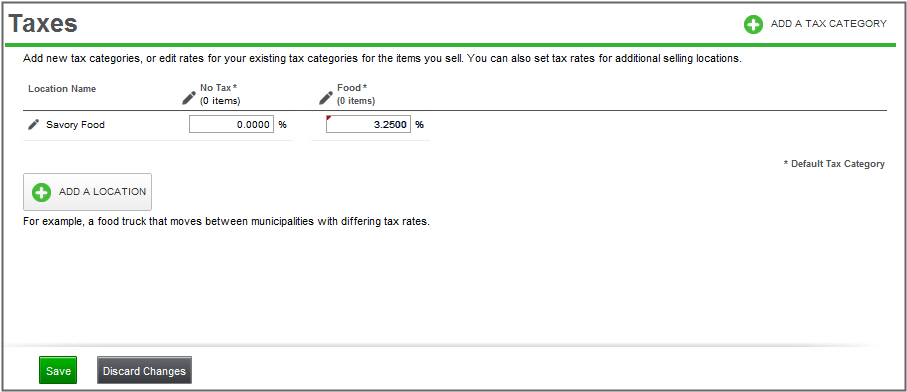
- Select Taxes.
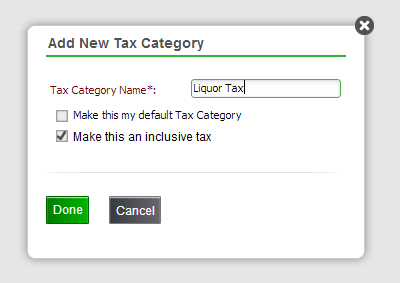
- Click the ADD A TAX CATEGORY button.
- A screen will appear for you to enter a descriptive name, select if it is default or make inclusive. If you select inclusive tax, the tax amount and the item sell price will combine to show one total on the POS (as opposed to tax amount and item amount.) However, your reporting will still show separate totals.
- Click the Done button.
- Enter the tax rate % that applies to the items in the tax category (such as, 3.250) into the tax percentage field. If you have multiple selling locations, you will need to enter the tax rate for every selling location.
- Click Save.
- If your merchandise requires multiple tax categories, repeat this process for every tax category you need to create.
Edit a Tax Category
- Click the Settings
icon located at the top-right corner of the screen.
- Select Taxes.
- View your tax categories and then:
- Click inside any of the tax category boxes to enter/edit the tax rate, and/or
- Click on the tax category's name to edit the name of the tax category
- Click Done to save your changes.
If you want to remove a tax category you have already set up:
- Click the Settings
icon located at the top-right corner of the screen.
- Select Taxes.
- Click on the name of the tax category you want to delete.
- Click Delete to delete the tax category. The Delete button will only be enabled if there are no items assigned to this tax category. The system will display an alert to let you confirm removing the tax category:
- Click Yes to remove the tax category. If the selected tax category has any sales activity, the system will let you know, so that you can determine if you still want to remove the tax category.
- Click No to keep the tax category.