The reports in Silver Back Office enable you to analyze and monitor your restaurant. NCR Silver Pro Restaurant divides the Silver Back Office reports into four sections: Operations, Sales, Customers, and Lists. All of the reports, except for lists, allow you to customize the time period for the report. You can either print the reports, or export the reports into a number of different formats.
Key Benefits of the Silver Back Office Reports
The following is a list, in menu order, of the NCR Silver Pro Restaurant reports available to you and their key benefits:
| Reports | Description |
|---|
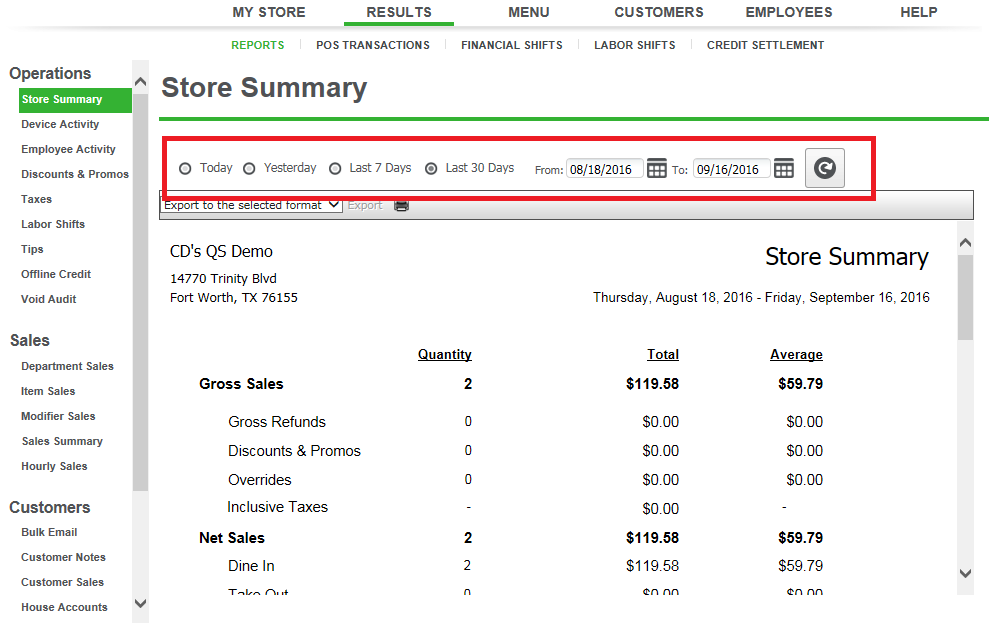
| Store Summary | Provides you with a summary of your sales activity for a selected time period. |
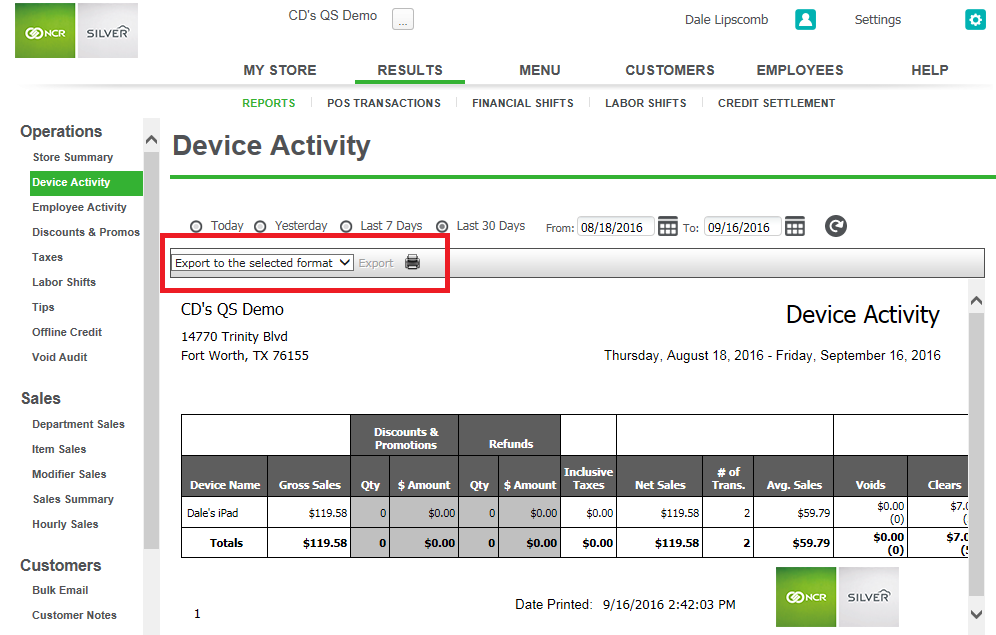
| Device Activity | Enables you to review the sales activity entered through each device. |
| Employee Activity | Enables you to review the sales activity entered by each employee. |
| Location Activity | Enables you to review the sales activity for each location. |
| Discounts and Promos | Provides you with an overview of the discounts and promos redeemed in your restaurant. |
| Taxes | Provides you with a breakdown of the taxes collected by tax jurisdiction. |
| Labor Shifts | Enables you to review the times your employees clock in and out and the total hours worked for a selected time period. |
| Financial Shifts | Enables you to review open and closed financial shift details such as sales, declared cash and over/short values. |
| Tips | Provides a report of the total amount of credit card tips declared by an employee. |
| Offline Credit | Enables you to review the offline credit transactions processed by device. |
| Void Audit | Provides you with a list and amount of the voided and cleared items entered by each employee according to date and transaction. |
| Department Sales | Enables you to track the sales activity for each department. |
| Item Sales | Enables you to track the sales activity for each item. |
| Modifier Sales | Enables you to track the sales activity for each modifier. |
| Sales Summary | Provides you with an overview of your sales and enables you to look for sales trends. |
| Hourly Sales | Provides you with a breakdown of your sales by hour and enables you to look for sales trends. |
| Bulk Email | Enables you to track the effectiveness of your marketing email messages. |
| Customer Notes | Displays the notes entered for your customers. |
| Customer Sales | Provides you with a sales summary by customer. |
| House Accounts | Provides you with a list of house accounts. |
| House Accounts Activity | Enables you to view the activity for all of your house accounts. |
| Items | Displays all of the items on your menu according to category. |
| Customers | Displays a list of all of your customers. |
| Devices | Displays a list of all devices associated with your restaurant. |
Accessing a Report
You can easily access and run a report in Silver Back Office.
-
In Silver Back Office, select Results > Reports.
-
Click the report you want to run. When you select a report, the system automatically generates the report. If you configure the report, such as the time period, or add a filter to the report, click  to refresh the report data.
Choosing a Report Date Range
The reports in Silver Back Office allow you to select a specific date or date range to run the report. The Reports function contains pre-configured dates and date ranges for you to use, or you can select your own date or date range.
-
On the Reports menu, select a report to run. The system generates the report in the Report Preview screen.
-
Select one of the pre-configured date ranges, such as ‘Today,’ ‘Last 7 Days,’ and ‘Last 30 Days.’
-OR-
Under ‘From,’ and ‘To,’ use the right and left arrows to select a start and end date.
-
Click to refresh the report data. The report appears in the Report Preview screen.
Exporting Report Data
You can export each report in Silver Back Office to a variety of file formats. For example, you may want to export your Customers list to an Excel file to create a ‘Mail Merge’ with Microsoft® Word®.
-
On the Reports menu, select, configure, and generate a report. The report appears in the Report Preview screen.
-
In the Report Preview toolbar, select a format to which to export your report data from the drop-down list.
-
Click Export. A Windows prompt appears.
-
Click Save As from the drop-down list at the bottom of the screen. The ‘Save As’ screen appears.
-
Navigate to a folder on your system to save the file.
-
Type a file name that best meets your operational needs.
-
Click Save.
