Basic Item Setup
Use this Basic Item Setup to enter basic items quickly and efficiently. Basic Item Setup includes general information about the item, as well as price and tax information. If you have more complex items, use the Extended Item Setup.
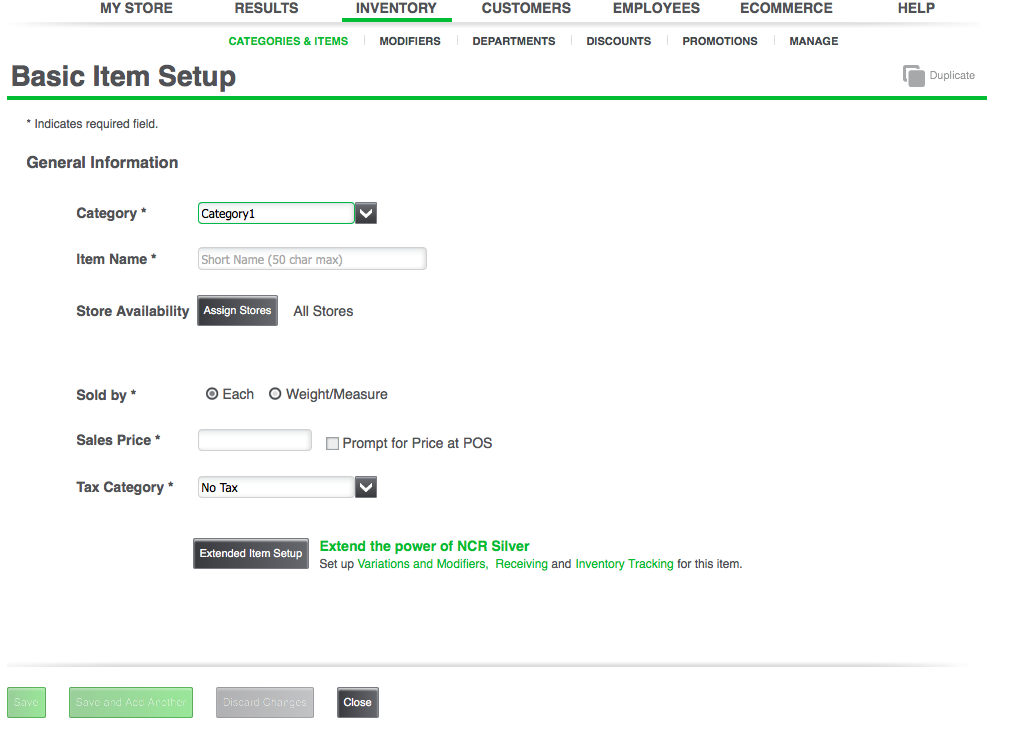
To create an item using the Basic Item Setup:
-
Select INVENTORY > CATEGORIES & ITEMS.
-
Select the category for the item from the left side of the screen and select CREATE AN ITEM.
-
Enter an Item Name of up to 50 characters. Some names may be shortened on the POS to fit the screen.
-
By default, the checkbox for This item is available at the POS is checked for you. This means once you have set up the item, it will be displayed on the POS and available for sale. If you do not want this item to display on the POS, uncheck the box.
-
Select either the Each or Weight/Measure option to indicate how you want to sell the item. The price for a weighed or measured item is per pound, foot, or whatever your unit of measure may be. Your employees will need to know how items are weighed/measured.
-
Enter the Sales Price for the item in xx.xx format.
-
If you want the system to alert the POS user to enter a price for the item at the time of the sale, check the Prompt for Price at POS box.
-
Select the Tax Category for the item. The system will automatically select your default tax category, but you can click the field and select another tax category for the item.
-
Do one of the following:
-
Click Extended Item Setup if you need to enter more information about this item, such as variations, bar codes, inventory tracking information, etc.
-
Click Save to save your changes. The system will return you to the CATEGORIES & ITEMS main screen.
-
Click Save and Add Another to save this item and start adding another new item. The system will return you to the Basic Item Setup screen.
-
Click Discard Changes to not save any of the information you entered. The system will prompt you to confirm that you want to discard your changes.
-
Click Close to close the screen. If you have made changes that you haven't saved, the system will prompt you to confirm that you want to discard your changes.
By default, items are displayed in alphabetical order in the POS app. However you can easily change the order using the Sort Order feature in the Back Office or by dragging and dropping in the POS app.
keyword: basic item setup, item setup, back office items, creating items
