Receipt Printer Model 310 Wireless Connection Setup
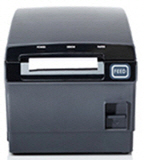
If your router is not near the countertop receipt printer (Model 310), you can use a Wi-Fi adapter to connect the receipt printer wirelessly to your router.
|

|
If you are setting up multiple receipt printers, configure each one separately. Only one receipt printer can be turned on at a time during setup.
|
Before Your Begin
Hardware Connections
-
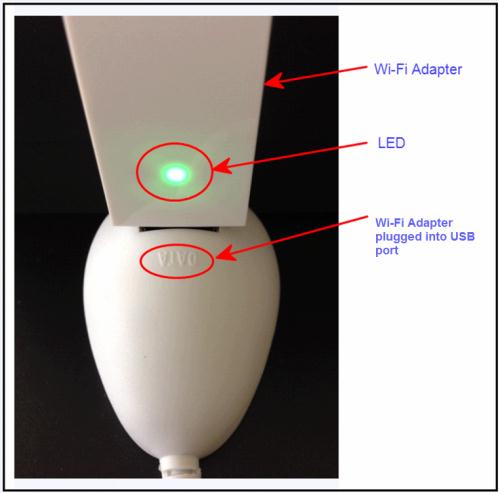
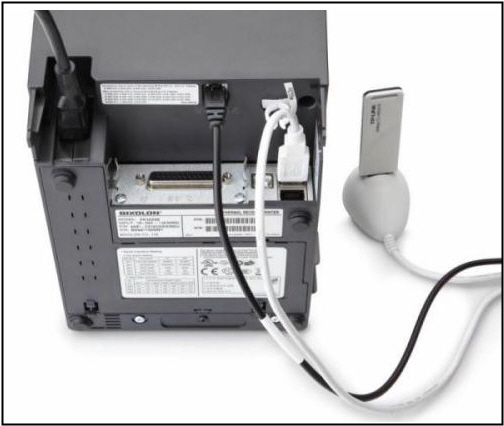
Plug the Wi-Fi adapter into the USB port located on the top of the extension base (included). The port is labeled “Data”.
-
Plug the cord from the extension base into the USB port located in the back of the receipt printer. The LED on the Wi-Fi adapter will light up when it is plugged in and the receipt printer is turned on.
Connecting Your POS Device to the Printer's Network
-
Open the POS app and log in using your PIN.
-
Go to the POS app Home screen by tapping the Home icon in the upper-left corner of the screen.
-
Tap  located near the top-right corner of the screen.
-
Tap Configure printers.
-
Tap Find new printer.
-
Tap Using wireless adapter.
-
If this is the first time that you have configured the printer, tap No.
-
On the POS device, go to the “home” screen by clicking the Home button, then tap the Settings app, and then tap Wi-Fi.
-
From Choose a Network..., select the NCRSilver_Printer.
-
Close the Settings app by pressing the Home button on your POS device.
Linking Your Printer to the POS App
-
Re-open the POS app and wait until the label on the button changes from Waiting to Next.
-
Tap Next.
-
Wait for the receipt printer to print a receipt with a confirmation that the printer is now in configuration mode.
Connecting Your Printer to Your Store's Wi-Fi Network
-
Select your store's wireless network from the list of Wi-Fi networks displayed and enter your network password, if required, and tap OK.
-
Wait until the receipt printer prints a message receipt (this may take a few minutes). Keep this message receipt as it contains information you may need later.
-
Read the bolded wording at the top of the message receipt and follow the prompts on your POS device's screen.
-
Tap the correct response on your POS device's screen that matches the wording on the top of the receipt.
Reconnect the iPad to your store’s Wi-Fi network
Now that the printer is on your store network, you need to reconnect the iPad itself to your store network.
-
On the iPad, go to Settings and select Wi-Fi.
-
Select your store’s network and enter the password if required.
-
Close the iPad Settings app and open the POS app.
-
Tap Next.
-
The POS app will automatically find your printer and display “Printer found” on the screen. This may take a few seconds.
-
Tap Next.
-
Once the iPad connects to the printer, another message receipt will print. Read the bolded message on the receipt and select the correct response on screen.
Configuring Your Printer in the POS App
-
Provide a Printer Name that is something meaningful to you, such as the area of the store where it is located.
-
Choose your printer's role. Two types of printers are available to use with the POS app:
-
Receipt Printer — is a receipt printer used to print customer receipts and to provide a means for signature capture if you do not have digital on-screen capture set up.
-
Kitchen Printer — is used to print a kitchen "chit". A chit contains instructions to the kitchen or other prep area on how to prepare an item. Kitchen chits do not look just like regular receipts — they display the item name and how to prepare it (via modifiers), but they do not include any price information.
-
If you only have one printer, it can be used as both a receipt printer and a kitchen printer.
-
Toggle the Cash drawer attached button to On if you are using a cash drawer in conjunction with the receipt printer. The cash drawer will open automatically for cash transactions.
-
Tap Done when you are finished.
-
Tap the blue arrow button next to the receipt printer's name.
-
Tap Print test receipt to see a test receipt.
-
Set the printer to Default if you want this receipt printer to be your default POS receipt printer.
- Select Done when you are finished.
This feature is only available on the iOS platform.
keywords: printers, hardware, wireless setup, configure printer,
