Scenario 3: Set up Additional Tax Categories
So, now the Savory Foods Cafe and our Savory Foods On the Move food truck are experiencing incredible sales, and we have become very popular and have quite a fan base. Our food truck often travels to festivals and concerts, and our customers have asked us to sell beer along with our great good. Some of our customers have even asked for t-shirts and caps with our Savory Foods logo on them. Life is good! These additions to our items are not classified as food, so we will need to add two new tax categories, Alcohol and General Merchandise. Just like Food, each of our selling locations charge different tax rates for these as well. No problem, the system can handle that too.
We'll start with adding the additional tax categories first, and then we will enter the tax rates for each selling location.
Click ADD A TAX CATEGORY and set up a tax category named Alcohol and click Done. Now, repeat this same process to add the General Merchandise tax category.
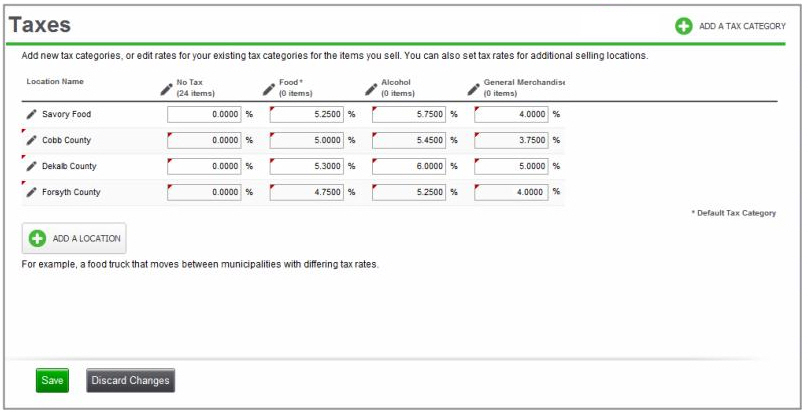
Now that we have added the new tax categories, we will need to enter the tax rate for each of our selling locations for the two new tax categories. Click in the box below our new Alcohol tax category and enter the alcohol tax for each selling location, including our default/home location in Fulton County. Then, click in the box below our other new General Merchandise tax category and enter the general merchandise tax for each selling location and click Save. When we're done, our Taxes screen looks like this.
Now that we have the new tax categories set up for our beer and t-shirts, we are ready to add those items to our inventory. For more information on how to do this, refer to Basic Item Setup.
We're almost done. We've got our selling locations, tax categories, and tax rates for each selling location. Now, we need to add our new items to our inventory. Remember, we made Food our default tax category, so all the items we create will be automatically assigned to the Food tax category. Since alcohol is taxed differently than food items, when we add the new beer that we sell, we will click the Tax Category dropdown for that item and change the tax category from Food to Alcohol. When we add our new Savory Foods t-shirts and caps, we will click the Tax Category dropdown for that item and change the tax category from Food to General Merchandise.
Time to Sell
OK, our setup is done, and we are ready to sell all of our new items in each of our selling locations. As before, whenever we arrive to our selling location and log in to the POS app, we select our selling location from the list, and that's it. Now, every sale will charge the correct tax rates for all of our items. The system will track all of our sales and display our selling locations on the Taxes Report.
