| Description | Returning an Item Using the Returns Mode
There are multiple easy to use methods for completing returns. The easiest method for returns without a sale, Returns Mode, is dedicated to making returns as quick and easy as possible.
To process a return using the Returns Mode:
 -
Log into the POS app.
-
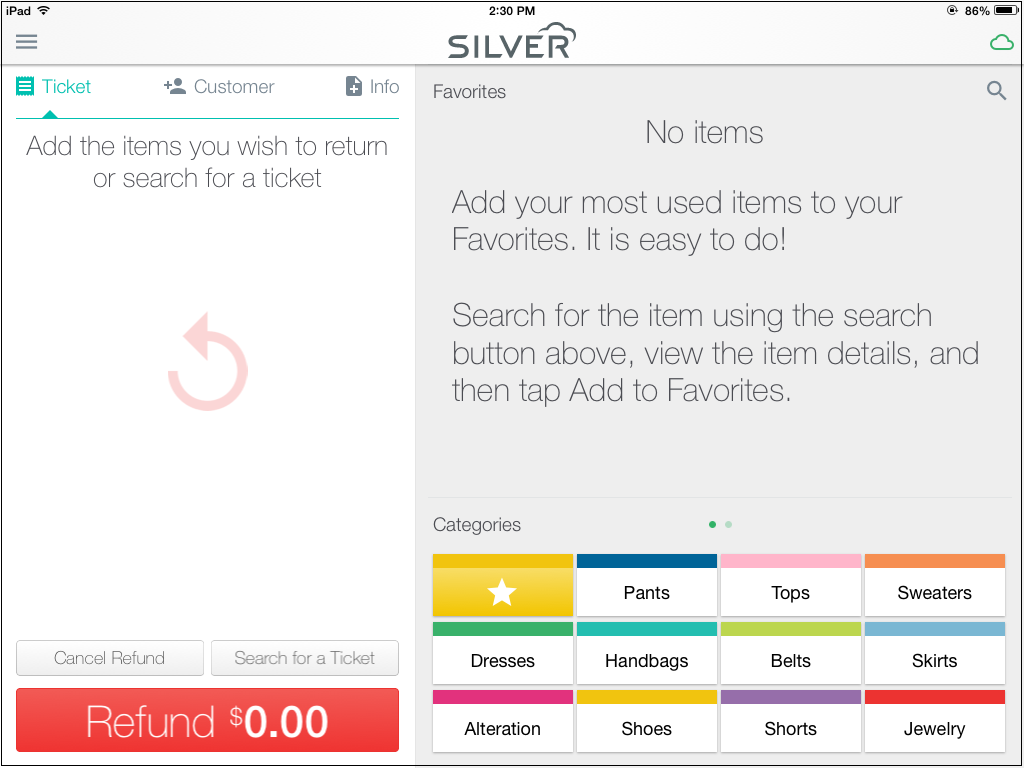
At the ticket screen, Tap the Start Return button at the bottom of the left panel.
-
The Pay button changes to Refund, there is a red return arrow in the background, and a line of text instructing you to add items you wish to return or search for a ticket to return.
-
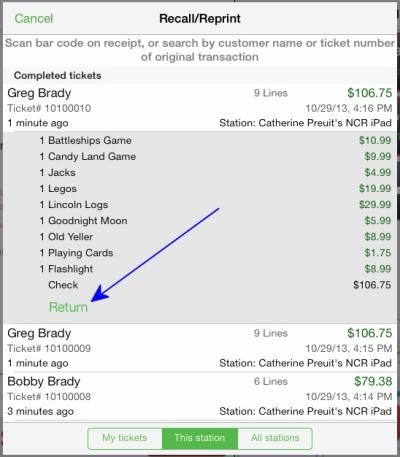
If you are searching for a ticket, tap Search for a Ticket, and the system will display the Recall/Reprint screen. Scroll through the list of completed tickets or search for a specific one.
-
Tap the ticket and the system will then display the items on the original ticket.
-
Tap Return then select which items should be returned. The system will show these selected items with a checkmark. Once you've selected all the items being returned, tap Done.
-
The system will show the selected items in the ticket area on the left screen panel. The amount shown in red as a negative amount with a red Refund button.
-
Tap Refund and select the refund tender type.
-
If you are using integrated credit, and the customer used a credit card for the original purchase, the system will prompt you to return the amount to the original card. To do this, simply tap Yes, wait for the system to authorize the refund, have the customer sign and Accept, and then print the receipt.
-
If you are using non-integrated credit & customer paid with credit card Select the Non- Integrated payment type, tap Yes to confirm the refund amount, then refund the card using your non-integrated terminal
-
If the customer paid with another payment type, select the tender type, confirm the refund amount and print the receipt if desired (best practice is to print the receipt for a refund and mark the original receipt as refunded if available).
|
|
|---|
