Multiple Selling Locations
If you are a mobile business, you may be selling in one municipality one day and a different one later that same week, or even in the same day. Setting up multiple locations lets you set up the tax rates for the different locations before you arrive to begin selling, as well as any local tax jurisdictions that are required for your selling location. You just need to change the selling location when you log in to the POS app, and the system will apply the correct tax, eliminating the need to adjust taxes at the item level.
Tax Jurisdictions
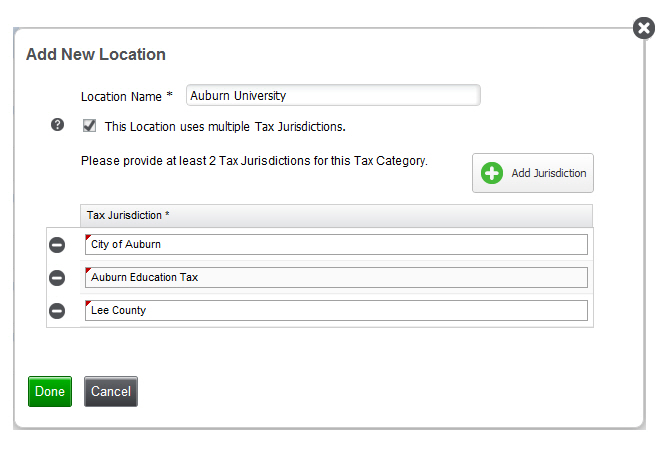
You can set up and report on multiple tax jurisdictions that are calculated independently of each other for those selling locations that require this tax scenario. The system will also itemize the tax jurisdictions on the receipt, as is often required by local regulations. The tax jurisdictions are tied to your tax categories and selling locations. This means when you add a selling location, you can designate any local tax jurisdictions. Additionally, if you have already set up your tax locations and categories, you can simply edit the tax location to enable tax jurisdictions.
Add a Selling Location
-
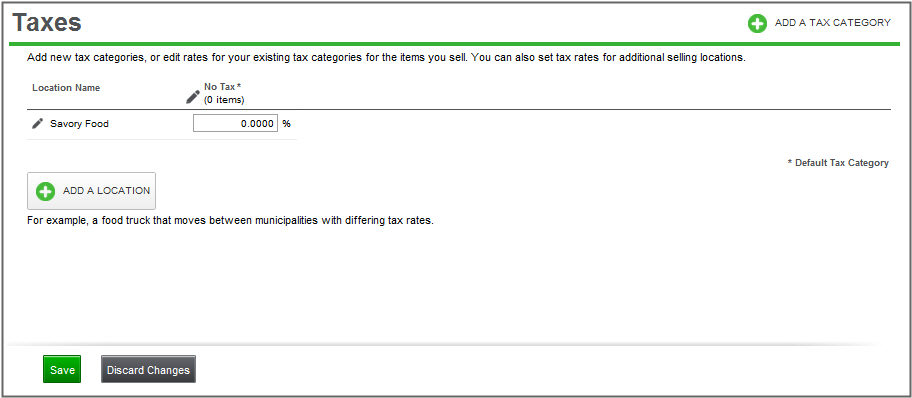
Select SETTINGS > TAXES.
-
Click the ADD A LOCATION button.
-
Enter a name for the selling location.
-
OPTIONAL: Click the This Location uses multiple Tax Jurisdictions checkbox, as appropriate.
-
Click Done.
-
Enter all the tax rates for this selling location, including any optional tax jurisdictions, and click Save.
The next time you log in to the POS app, the app will ask you to identify your current selling location. Simply select the location from the list, and the system will apply the appropriate tax rates for that location.
Edit a Selling Location
If you want to edit a selling location:
-
Select SETTINGS > TAXES.
-
Scroll through the list of your selling locations and then you can:
-
Click inside any of the tax category boxes to enter/edit the tax rate, or
-
Click on the location's name to edit the name of the selling location and/or enable tax jurisdictions for the selling location.
-
Click Done to save your changes.
Remove a Selling Location
If you want to remove a selling location:
-
Select SETTINGS > TAXES.
-
Scroll through the list of your selling locations and click on the name of the selling location you want to delete.
-
Click Delete to delete the selling location. The system will display an alert to let you confirm removing the selling location:
-
Click Yes to remove the selling location. If the selected selling location has any sales activity, the system will let you know, so that you can determine if you still want to remove the selling location.
-
Click No to keep the selling location.
|

|
Removing a selling location is a "soft delete". This means that although the selling location is removed from your view, all the data and activity associated with that selling location is still shown in reports, transactions, etc..
|
Keywords: multi store, multi store setup, multiple selling locations