Adding Items with the Bar Code Scanner Using Item Lookup in the POS App
A POS user must be assigned to a user role that has been granted access to the Category/Item Management feature to add a new category in the POS app.
When you scan an item and the bar code isn't found, the POS system will alert you via a "negative" sound and display a popup screen to alert you that the system did not find the bar code.
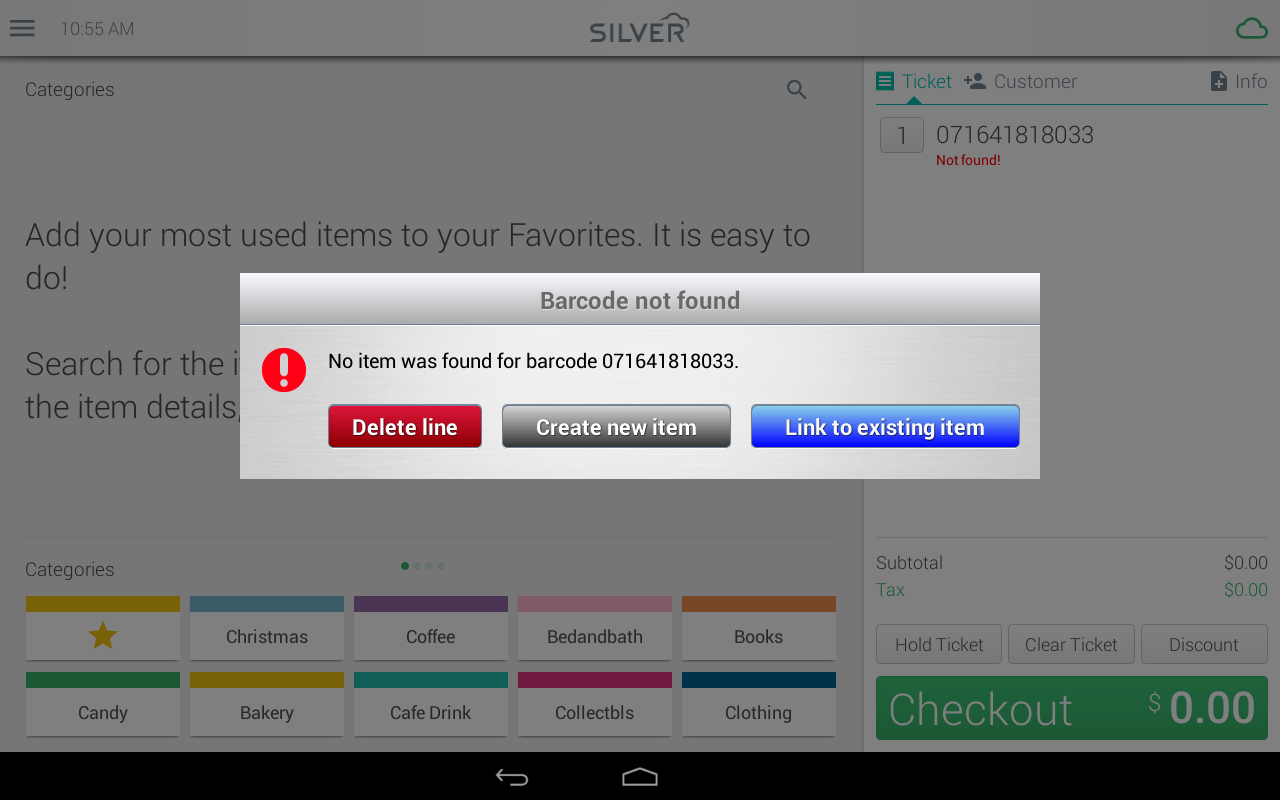
You have the option of linking the barcode to an existing item or creating a new item. Tap Create new item on the Barcode not found window. The system will display the Add Item screen. Continue the add item process below.
NOTE: Multi-store Customers: If you complete this process, the item will be created as a store-specific item for the store you are currently logged into on the POS app. If this item needs to be available for all of your stores, please update this in the Back Office by assigning the item to all of your stores.
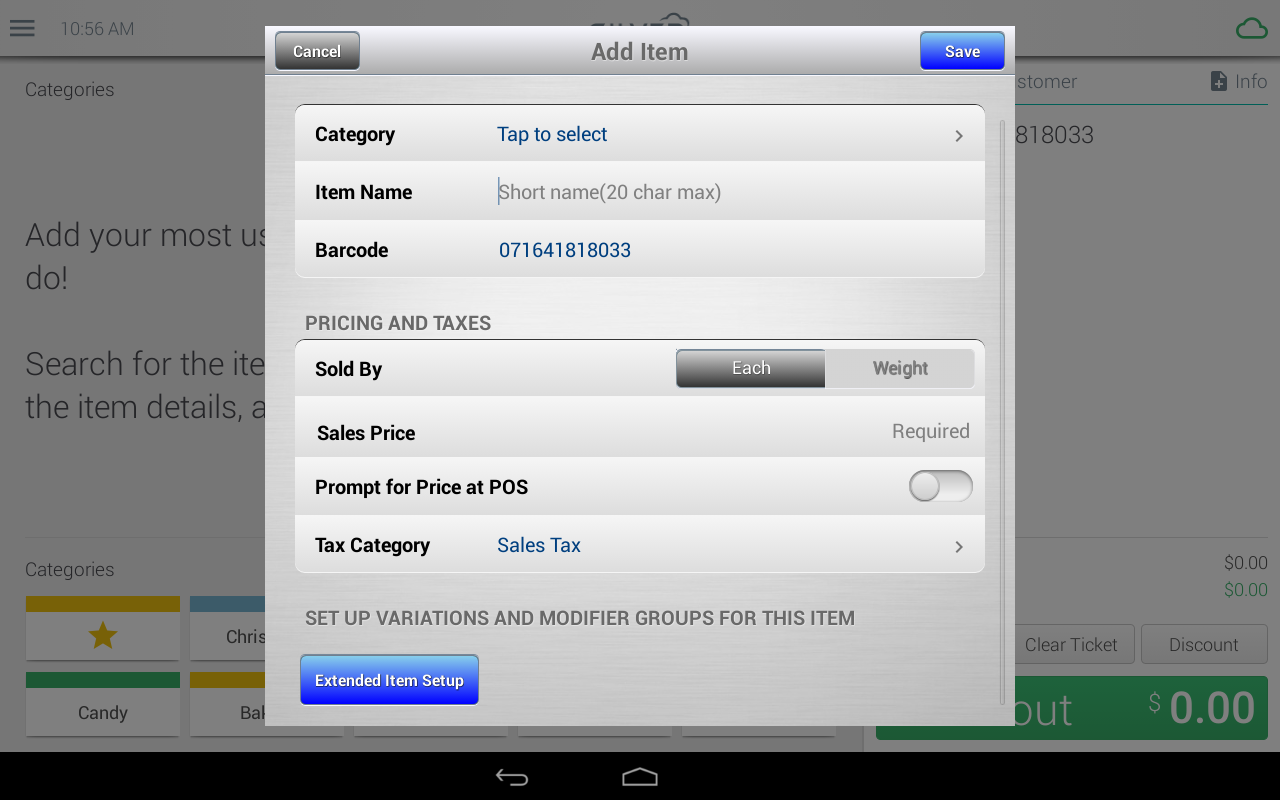
- Enter an Item Name of up to 20 characters.
- iPad users will have the option to add an item description, or it can be added at a later time in the back office.
- Tap Each or Weight to indicate whether you sell the item by quantity or by weight.
- Enter the Sales Price for the item.
- If you selected the Each option, the amount you specify is the selling price for each unit of the item.
- If you selected Weight, the amount is the selling price per unit of measure.
- Select the Prompt for Price at POS ON/OFF slider to ON only if you want the POS device to prompt users to specify a price when they sell the item.
- Tap Tax category to display the Tax Categories window, and then tap the appropriate tax category for the item.
- Tap Extended Item Setup if you need to set up the following options:
- To set the printer group, tap Printer Group and the select the printer group you want to assign.
- If the item has variations, tap Set variations
- Tap Add variation and select or enter an appropriate label for the variation group (such as Color).
- Tap the Add button within the newly created group to create the specific options (Red, Blue, Green). Tap Done when complete.
- Adding a variation will open the option to Price by Variation on the Add item screen under Pricing and Taxes.
- If the item has any modifiers, tap Assign Modifier Groups.
- Select the modifier groups that you'd like to associate with the item. Tap Done when all groups are selected.
- When finished, tap Save to add the item.
